
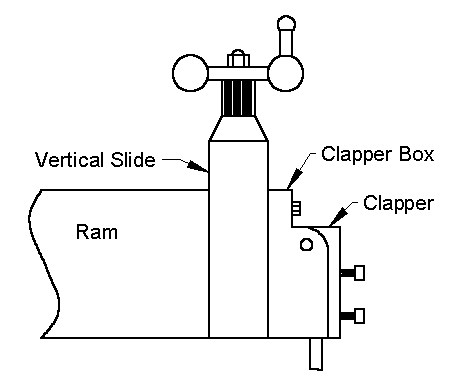
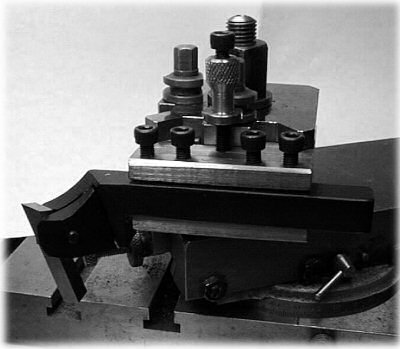
English Style Tool Post
Drawing by Kay Fisher
The English-style tool post, shown above, mounts the tool further back than the American style, putting the cutting edge more in line with the pivot point of the clapper. This helps to eliminate the bounce pattern visible on many shaper finishes, as mentioned by Rudy Kouhoupt in the January/February issue of Home Shop Machinist magazine. The English style is less convenient than the American style for setting up tool angles.
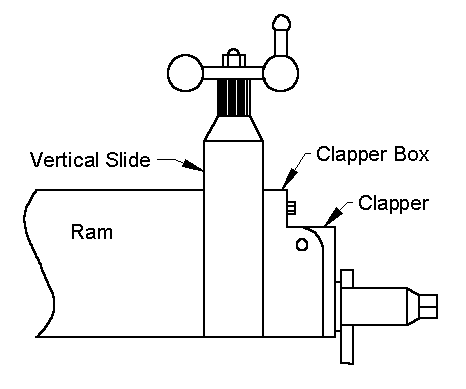
Lantern-style tool Post
Drawing by Kay Fisher
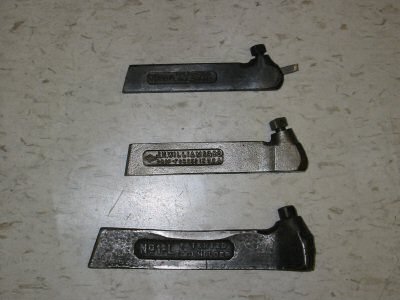
Three Smallest Armstrong Style Tool Holders
Photo by Kay Fisher
They come in many sizes. Pictured above are the smallest three sizes #00 at the top, #0 in the middle and #1 at the bottom.
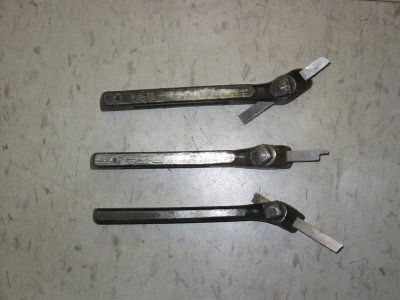
Set of Armstrong Style Tool Holders
Photo by Kay Fisher
A complete set is includes a left, right and straight holder, as shown above.
| Armstrong Style Tool Holders | ||
| Holder Size | Shank Size | Bit Size |
| #1 | 1/2 x 1 1/16 | 5/16 |
| #0 | 3/8 x 7/8 | 1/4 |
| #00 | 5/16 x 3/4 | 3/16 |
Diamond Tool Holder
Photo by Kay Fisher
The disadvantage of this holder for lathe use is that after grinding, you must readjust for center height. Since we are using the tool on a shaper, we are not so concerned with readjustment after grinding.
They are advertised regularly in Machinist’s Workshop and Home Shop
Machinist Magazines and are available from:
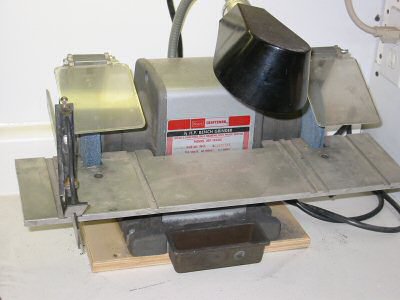
Homemade Table on Old Sears Grinder
Photo by Kay Fisher
Pictured above is the table I made for my old grinder using a scrap aluminum plate bolted to the existing tool rests. Both sides tighten up with wing nuts. I milled slots in the top for a miniature miter gage.
There is an excellent article in the July/August 2003 Issue of The Home Shop Machinist by Steve Wellcome called “Sharpening HHS Lathe Tool Bits. I highly recommend this magazine. Back issues are available. I also recommend their books.
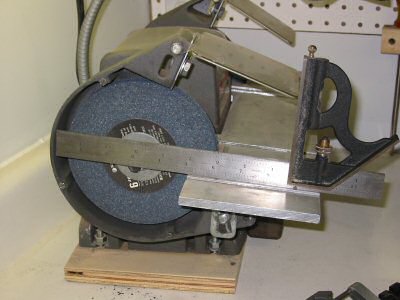
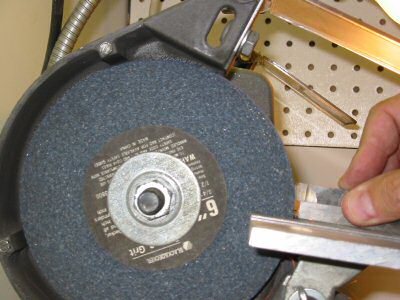
Setting Grinding Table Height
Photo by Kay Fisher
To show details more clearly in these photos, I removed the wheel guard. Based on Steve Wellcome’s article, I set my table to be at the center height of my grinding wheel.
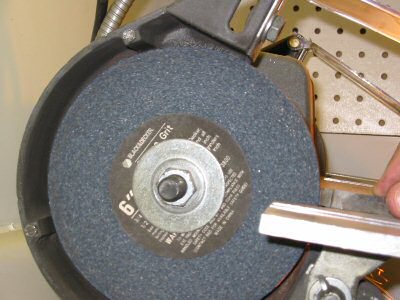
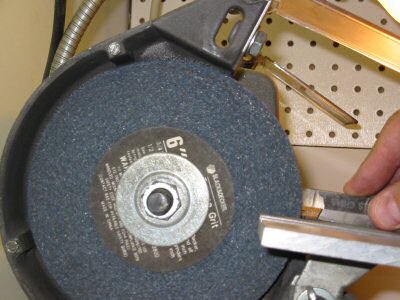
Grinding 7.2 Degrees
Photo by Kay Fisher
This puts the top of a 3/8” tool 3/8” above the wheel center, giving a clearance angle of  , where H is the height above the centerline (in this case 3/8”), R is the radius of the 6 inch grinding wheel (3”) and A is the resulting clearance angle at the tip.
Grinding 14.5 Degrees
Photo by Kay Fisher
To grind 14 degrees, put a spare 3/8” tool blank under the 3/8” tool bit.
Grinding 12.0 Degrees
Photo by Kay Fisher
To grind 12 degrees, put a spare ¼” tool blank under the 3/8” tool bit.

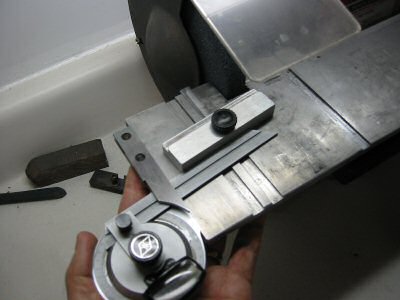
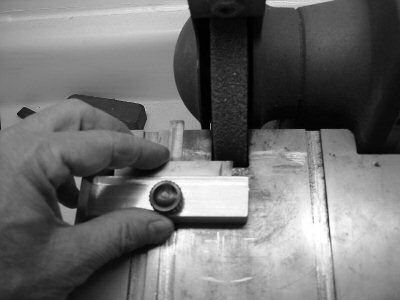
Miter Gage
Photo by Kay Fisher
I use a protractor to set the miter gage for the 7 degree relief angle, as shown below.
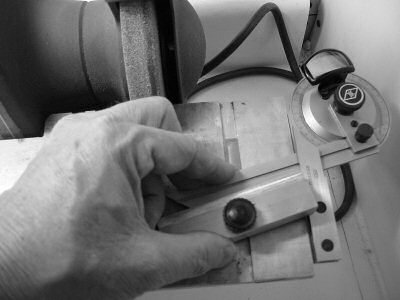
Setting Miter Gage to 7 Degrees
Photo by Kay Fisher
This angle defines this tool style. To facilitate grinding this angle, I mounted a 1-2-3 block on the miter gage. Because my table is aligned with the center of the wheel, this also grinds in front clearance.
Grinding Relief and Front Clearance
Photo by Kay Fisher
Front clearance and relief are easy to grind. Mounting the table at center height while grinding a 3/8” tool bit sets the clearance to 7 degrees. Setting the miter gage for 7 degrees sets the relief angle required for a knife style tool.
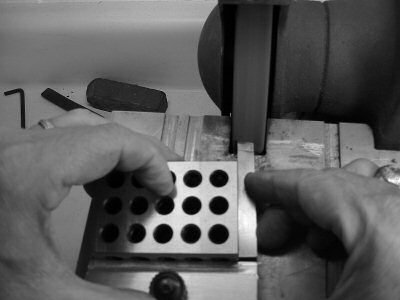
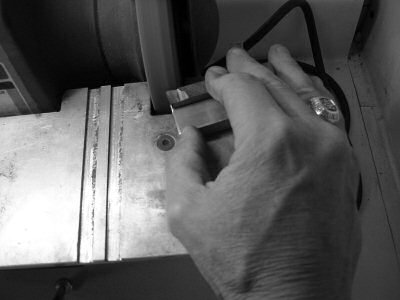
Grinding Side Clearance
Photo by Kay Fisher
Side clearance is simple using the miter gage to hold the tool straight. The 7 degrees angle comes from the position of the top of the tool over the wheel center line.
Setting Miter Gage to 14 Degrees
Photo by Kay Fisher
The compound angle of top and side rake on the top of the tool is slightly harder to set. Top rake comes from setting the miter gage to 14 degrees with a protractor.
Grinding Top and Side Rake
Photo by Kay Fisher
Side rake comes from raising the tool by mounting it on the 3/8” ledge of the miter gage. When completed, the tool has a compound rake angle as shown below. It can be used for both cutting down and right.
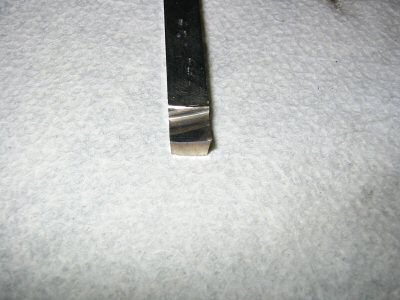
Right Knife Tool Completed
Photo by Kay Fisher
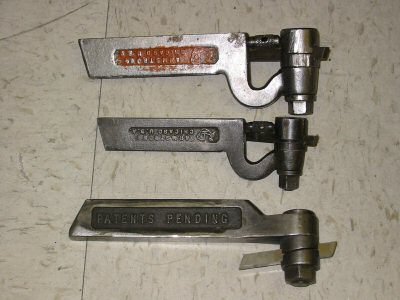
Special Tool Holders
Photo by Kay Fisher
The shaper tool holder on the bottom of the photo is continuously variable in angle and holds the tool with built in rake. Also, it holds the tool bit further back to line up closer to the pivot pin of the clapper box. It is my favorite of the special shaper tool holders. This one was made by the Colton Comb Tool Co. of Easthampton Massachusetts. I got them free from friends or for less than 5 dollars at swap meets in New England. Today this type of shaper tool holder sells for more than $70 on eBay. They aren’t very complex. You could easily make one. There are good plans available on-line in the Yahoo group “Metal_Shapers” file section. The file name is holder1.jpg and it was designed and submitted by Art Voltz, a frequent contributor to the group and to this column.
The problem with all tool holders is that each mating surface decreases rigidity. Just mounting a tool bit in the tool post gives the best rigidity and the least chatter and flexing. In the photo above you see a very large tool bit (3/8” wide and 1” deep) mounted in the tool post.
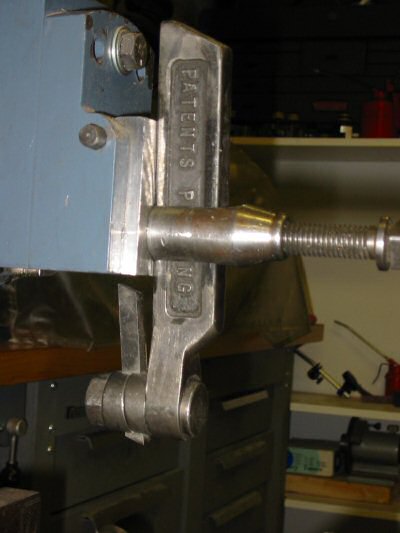
Good Shaper Tool Holder
Photo by Kay Fisher
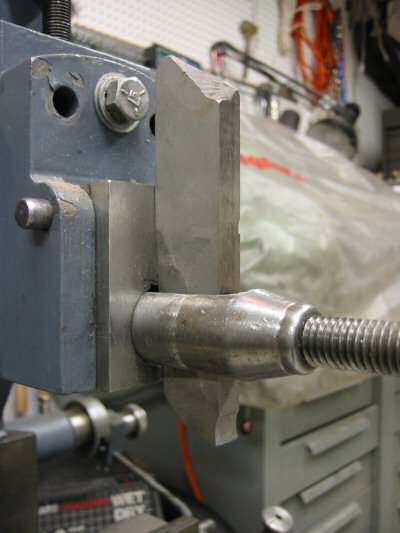
Large Tool Bit in Tool Post
Photo by Kay Fisher
Next month, in part 3, we will get an expert’s contribution on the shearing tool – a tool with a special angle that has particular application to shapers.
Keep sending me email with questions and interesting shaper stories.
My email address is KayPatFisher@gmail.com.